Sunday, April 19, 2020

Homemade garlic toast (Freezer friendly)

Garlic toast recipe (Freezer Friendly)
Ingredients:
   1. 8 tablespoons of butter, room temperature 
   2. 2 tablespoons of olive oil
   3. 4 cloves of garlic
   4. 1/4 tsp garlic powder
   5. 1/4 tsp of salt
   6. 1 tableapoon of dried parsley
   7. 1 loaf of French bread, sliced
 
You’ll start by mixing everything in a bowl! 
https://drive.google.com/uc?export=view&id=1z3_K7byLnm1RUbDbvjwJYHOqO-R8lVnZ
Now, cut your bread into 1 inch slices (or however thick you want your toast to be) and 1/2-1 tables spoon of spread to each side and spread it on from edge to edge.
https://drive.google.com/uc?export=view&id=1oD9emHylZQ1MQSqUS3_o7HzmGPVYvPH4
Repeat this for every slice of bread and you should be good to go! Line a baking sheet with parchment paper and freeze for a half hour to help keep the spread firm for when you freeze it. Vacuum seal your slices and that’s it! These will last up to three months in the freezer. When ready to bake, preheat the oven to 400 and take what you want to make and  bake from frozen for 10-15 minutes or until golden brown. Flip half way through for a little extra crisp. 
https://drive.google.com/uc?export=view&id=1r7t_KhuPcGAX44md55YMFbFAS8sCeI3N
So good and super easy! You can also make up the spread and freeze for later use! I like to make pasta gift baskets and gift this with some fresh French bread! It makes the perfect gist! 


Thursday, April 16, 2020

Tater tot Hotdish (Freezer meal)

Here’s our go to recipe for tater tot hot dish! Not only is it tasty and filling, it’s also freezer approved!
https://drive.google.com/uc?export=view&id=15nC_JNWCg1qYnVyPoAoYgoSkOkIjDIy6
You’ll need one can of green beans, one can of corn, 1 can of cream of mushroom or chicken soup, 1 bag of tater tots, 1 1/2 pounds of ground beef, 1/2 cup minced white onion and a 1/4 cup of milk (not pictured).
https://drive.google.com/uc?export=view&id=1XfNbXeQA8GUyiapM9AzB6BTNpA9n-EVY
You’ll want to start by growing the meat with the onions. Drain and set aside. In another bowl, drain and mix the corn and green beans together. And set aside. Then in another bowl, mix the soup and the milk together and gently whisk  until smooth. 
https://drive.google.com/uc?export=view&id=18JjSxhm3a1kDB62rggQC2_7AKBGmOzLH
Layer in your pans in this order. Meat, veggies and then spread soup on top of the veggies (do not mix). Lastly, layer your tater tots across the soup. Cover, date and label. If cooking right away you can bake it at 350 for 30-40 minutes. Sometimes I’ll put a little bit of cheese on top! This recipe will keep in the freezer for about a month. I
https://drive.google.com/uc?export=view&id=1sgPpXpthj3V0xrhMWk4-wApXm9rYR52K

Tater tot hotdish (Freezer friendly)
Ingredients:
   1. 1 can of sweet corn (drained)
   2. 1 can of green beans, French style (drained)
   3. I can of cream of mushroom soup
   4. 1/2 a cup of diced white onion
   5. 1/4 cup of milk
   6. 1 1/2 pounds of ground beef, browned & drained
   7. 1 bag of tater tots (2 lbs) 
Directions:
   1. If cooking right away, preheat over to 350.
   2. Start by browning your ground beef with your onions, drain and set aside.
   3. Drain and mix your corn and green beans together and set aside.
   4. Mix your soup and milk together in another bowl and set aside.
   4. Layer in your baking dish. Start with the meat, veggies, soup and then layer tater tots on top. This recipe should make two small hot dishes or one large one. Bake at 350 for 30-40 minutes or until warm throughout. Add an extra 5-10 minutes for the largerdishes  and check every 5 minutes for doneness. If freezing, wrap and date and label. These will last up to a month in the freezer. 
   

Sunday, April 12, 2020

Dollar tree beehive decoration

Check out this fun craft I did! It’s a beehive decoration that I made out of dollar tree products! They are super easy to make, cheap and don’t take too long! I made 4 of them in about an hour! Here’s what you’ll need!
https://drive.google.com/uc?export=view&id=1Mq-zaxpR0DrraN8fT4Dt2GoNxpoT9mN8
Start by gluing your rope to the edge of your flower pot.
https://drive.google.com/uc?export=view&id=1PWX-aAqdSZ_7W4KBsGQC_-T8isgWRDAI
Glue strand by strand, putting a small amount of glue on the piece of top and pressing down lightly to make them stick together.
https://drive.google.com/uc?export=view&id=1XoRoKnUTbxqYQjE6IlmmPhVK8AwzwN2q
You’ll come to a part like this, so just open your neck packeage of rope and continue on.
https://drive.google.com/uc?export=view&id=1CJdGrXzJ3SewSSfdXx6ZLHWBG4rXIZYe
Just like this! 
https://drive.google.com/uc?export=view&id=1Gvsq8pi9bzlxlM67VsRkNvhCvrF8av8x
Once you get the hang of it, you’ll cruise right along!
https://drive.google.com/uc?export=view&id=1dFlWkMiLoEWIG9avHs4AG82EvFfqBaYA
Cut a 3-4 inch piece of rope for the loop on top!https://drive.google.com/uc?export=view&id=1aaTQ-Dasfy087M8zfF9hDQX4AjORuboy
Place a dab of hot glue in the center and place your loop!
https://drive.google.com/uc?export=view&id=1dsinLNdQhAfrDEWVqgwiuQGex0wYf5We
Make sure to hold your loop as you glue near it so it doesn’t get stuck on any stray glue! 
https://drive.google.com/uc?export=view&id=1evdEwIlV7Gh-kGiMZN3pGbnL33jzH7Os 
Glue a few layers up, until you get to about half way to your loop and start gluing them inwards! 
https://drive.google.com/uc?export=view&id=17DK3Mj9-QBFUp6rN0fLzYnHogW17g7x9
When your 3/4 of the way to your loop, start gluing and going inwards towards the loop
https://drive.google.com/uc?export=view&id=15LOY2NvWsEAL9D29V9qlga1x1hMVKgdK
Just like this! 
https://drive.google.com/uc?export=view&id=1_2kdwlntdtzfnpyPJtnY20tMsyMNoCBw
Cut off your rope and tuck the last bit of rope you have, making sure to glue it down! 
https://drive.google.com/uc?export=view&id=109DEg7dcgIjh08_u7rxFsaklkVuiqnY5
Cut a 2-3 inch strand off for the holehttps://drive.google.com/uc?export=view&id=1QS34XC5icsvUjH-onvGMqjSWP1md9_j8
Put some glue on the top you just cut off and quickly yet carefully place it on your beehive, making a circle.
https://drive.google.com/uc?export=view&id=1CQ46i2nkD2FXDRC414EYYs32Q4dXC7DA
Color or paint it in and you’re good to go! 
https://drive.google.com/uc?export=view&id=1M26--au17SXqjPX5k9uXo4EZqdWFclXK
These were super fun to make! It’s the perfect beginners craft to do! I was able to make 4, in about an hour! Have fun y’all! 😁😁😁

Beehive craft
Material
   1. 3-4 packs of 9.5 feet Nautical decorative rope (I found mine by the floral stuff like the foam balls, gardening tools and flower pots, but not the seasonal stuff)
   2. Glue gun and glue sticks (I used 8-10 glue sticks on each beehive)
   3. Flower pot or any size pot you want.
   4. A black sharpie or black acrylic paint and a paintbrush of your choosing!


Directions
   1. Start by gluing your rope to your flower pot, starting at the bottom
  2. Once you reach the top, cut a 3-4 inch strand of rope off and make a loop and glue in the center of the top (bottom of the pot)
   3. Work your way up and once you get half way near the top of your loop, work your way into the center.
   4. As you get to the 3/4 of the way to the loop, start by wrapping the rope inwards and tucking in the end of the rope to close off the opening! 
   5. Cut a 2-3 inch strand, put some glue on it and then carefully gglue it to the front of your beehive, making it into a circle. Fill in the middle with either a black sharpie or black acrylic paint! 

Best sweet rub for grilled chicken or pork

https://drive.google.com/uc?export=view&id=1hWgomXO9dPi2-G9aCmF3n3Dpi5_LtR14
Over the weekend we made some pulled pork. Here is our go to recipe for a sweet rub! We usually slather a good amount on our pork butt (we got a 6 pound roast this time) and smoke it on our pit boss pellet grill!
https://drive.google.com/uc?export=view&id=1HQkMi-5B-AUXLkbfY1XsORIXXqASP9V7
You’ll want to place all your ingredients in a bowl and mix together! It’s really simple! Adjust the ingredients as you like, we always add a little more paprika and some red pepper flakes to ours.
https://drive.google.com/uc?export=view&id=1OMREw6bNJqUKzSAjE7F3FZgbfoyEcFrP
Here’s our pork, ready for the smoker! 
https://drive.google.com/uc?export=view&id=12B-Bgh_E9WjNdVEejQuvSYtY5d2lf-S3
Here is is after 11 hours on the smoker! It fell apart and tasted heavenly! 😍😍 I got my husband a Pit boss pellet grill last year for Christmas and it’s probably one of the best purchases I’ve made! It’s very user friendly and everything we’ve smoked has turned out amazing! 

BBQ Sweet rub
Ingredients
   1. 1/4 a cup dark brown sugar (can substitute light but the dark one give it a great flavor!
   2. 1 tablespoon of coarse sea salt
   3. 2 teaspoons of ground black pepper
   4. 2 teaspoons of smoked paprika 
   5. 2 teaspoons of garlic powder
   6. 2 teaspoons of onion powder
   7. 1 teaspoons of ground mustard
   8. 1/2 teaspoon of cayenne pepper
   9. 1 teaspoon of red pepper flakes (optional)

Directions:
   1. Combine all the ingredients in a small bowl. Stir well to combine, use a fork to break up any chunks.
   2. store in an airtight container. This recipe will last in the cupboard for up to one month.
   3. When ready to use, rub all over the meat of your choosing, cook and enjoy! 
   

Thursday, April 9, 2020

Quick and easy mashed potatoes

Easy mashed potatoes for two
https://drive.google.com/uc?export=view&id=1lZDVa0kJ3Csyae02GfYQpFt4DiKjODpC
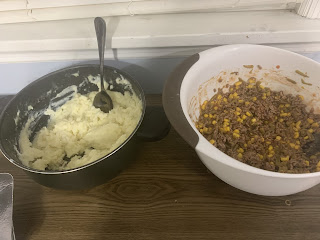
I made this batch for my shepherds piethat I made the other day! This recipe is my go to for mashed potatoes and yields a good amount, considering it’s just the two of us for now ☺️https://drive.google.com/uc?export=view&id=1MmiUnoL4yA-xOPl7YvniV5f2qm1xYlSP
You’ll need roughly 3 pounds of potatoes! Peel and rinse them and place them in a large stockpot filled with cold water. Pace on the stoverop and set to high until they come to a rapid boil, add a pinch of salt to the water and then slightly reduce heat and boil for 15 minutes (or until fork tender). Remove potatoes from pot, drain and place them back in the pot with the half and half and the butter and mash with your potato mashed or use an electric handheld mixture. Season to your liking (I usually add a little salt and stir to incorporate flavor). https://drive.google.com/uc?export=view&id=1M_rJ83ug-NRsiTAaOzdr1SZuzZteBJAD
This recipe can also be frozen too, store in mini loaf pans or even scoop into mounds (I use an ice cream scoop), freeze on parchment paper and then vacuum seal while they are frozen to keep their shape. Heat for 20-30 minutes at 350 straight from the freezer and stir, heat until warm all throughout. 
Easy mashed potatoes for two (Freezer friendly)Ingredients:   1. 3 lbs Baking potatoes, any type you like! We use Russel but can’t use gold, reds, etc.    2. 2 tsp salt (more to taste)   3. 1/2 stick butter   4. 1 cup of half and halfDirections:   1. Peel and rinse potatoes   2. Place potatoes in stockpot filled with cold water. Set heat to high and bring to a boil, add salt and boil for 15 minutes (or until fork tender all throughout)   3. Drain potatoes and return to pot   4. Add half and half and butter to the pot and mash with a masher or use an electric mixer until all is combined and texture is to your liking.   5. Enjoy! If freezing, can place in a loaf pan and bake at 350 for 30 minutes topped with butter straight out of the freezer. Stir and heat until potatoes are warm all the way throughout. Make sure to wrap good with foil or use a food saver if freezing and enjoy! 

ALDI shepherds pie for two (freezer friendly)

ALDI shepherds pie for two (Freezer friendly) recipe


Here’s what you’ll need for this super easy meal for two! This recipe is also freezer friendly! 
You’ll need 1 can of corn (drained), 1 can of french style green beans (drained), 1 can of tomato soup,  1.5-2 pounds of cooked ground beef, 1/2 tsp of dried basil, mashed potatoes (roughly 3 cups) and paprika!


I first prepared the mashed potatoes and set aside. You’ll want to cook and drain the beef, place in a large bowl and mix together everything but the mashed potatoes and the paprika in the bowl. This is where I set things up to get ready for the freezer.

In each of your containers I placed the meat and veggie mixture on the bottom and, spread the potatoes on top and then sprinkled a little bit of paprika over the potatoes. This recipe is really flexible too! Add whatever veggies you like! Sometimes I’ll top with cheese when I bake it for some added flavor! Yum! 
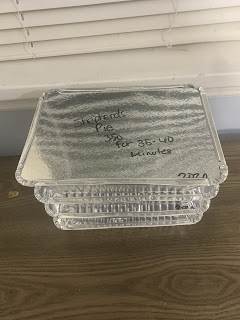
Don’t forget to cover and label your meals! I bake at 350 for 30-40 minutes! 
This recipe made us 4 containers! I picked up the containers at dollar tree! I got a 3 pack for $1 and they come with lids! Score! You can also make this recipe in the crockpot too! It’s the same, mix everything together and top with mashed potatoes and cover and cook on low for 5-6 hours. In the last hour sprinkle on your cheesy toppings if you have any! 
* We priced it out and this batch gave us four 2 serving containers and cost a grand total of $5.50, which brings the price per meal to roughly $1.36 each! πŸ˜‹πŸ˜‹ #AldiForTheWin


ALDI taco soup (Freezer friendly)

ALDI taco soup (Freezer friendly) 
https://drive.google.com/uc?export=view&id=16xMCqV8MNBHNkH6TI1whDJYfBTUMc_Wh
For this recipe you’ll need 2 cans of corn with juice,1 can of diced tomatoes with juice, 1 can of drained black beans, taco seasoning (1 packet or 1/4 a cup) 1 large diced onion and one pound of ground beef. You’ll start by browning and draining the ground beef and setting it aside. Dump everything in the cockpit and add 2 cups of water to your mixture and give it a good stir! I usually cook it on low for 6-8 hours! 
https://drive.google.com/uc?export=view&id=1q-5YC0xvDLthRka3yY6pG_4L_gTYxdJPhttps://drive.google.com/uc?export=view&id=1g5YWhCWN93l8Fi3V_SynYgh4EOOalqp8
I’ve also added chopped jalapeΓ±os to the soup as well! Usually I’ll do 1-2 medium sized ones! My husband loves this recipe! It’s freezer friendly too! Just dump everything (but the water) in a good freezer bag, I use my food saver and vacuum seal it! Don’t forget to label and date your soup! When we want it, I take it out of the freezer the day before and put it in the fridge. The next morning I’ll dump everything in the crockpot, add the water and put it on low and go about my day! I don’t can have to think about dinner and it’s awesome! https://drive.google.com/uc?export=view&id=13mRtuEmvn4i00azGmA-dNfaobSnTirJH
This recipe freezer well in soup containers too! I like to freeze them in 2 cup portions and then we have lunch for the day! I get these microwaveable freezer deli containers that work like a charm! One batch usually makes about 14-15 cups! We can usualy have a week of soup for one person in one batch when we freeze them in the 2 cup containers. This last batch I had 6 containers full, I had to “taste test” it before we froze it πŸ™ˆπŸ€£https://drive.google.com/uc?export=view&id=1OZqX7RWWa41WQ-K40FsjyTzvgygbuSF2
My husband said these work well for work! He usually puts on in the microwave for 2-3 minutes and stirs it every minute or so and it’s tasty! It’s still tasty after a few months in the freezer yet! 

ALDI slow cooker taco soup (Freezer friendly)
Ingredients:
    1. 1 can of diced tomatoes with juice
    2. 2 cans of sweet corn with juice
    3. 1 can of black beans, drained
    4. 1 large onion 
    4. 1 pound of ground beef, cooked and drained
    5. 1/4 a cup of taco seasoning or one packet 
    6. 2 cups of water
Directions:
   1. Mix together all your ingredients in your crockpot       and set on low for 6-8 hours, or until the veggies are tender!
   2. Serve and enjoy! It’s that easy! We usually top ours with cheese and sour cream! 

** If you plan to freeze your recipe, add everything but the water to a good quality freezer bag and seal it good! It should last a few months in the freezer! We’ve made some that’s been in the freezer for over 2 months and it’s still been good! When you want to make it, take the bag out the day before and thaw in the fridge. When you go to make it, dump the contents of the bag into your crockpot along with the 2 cups of water and put it on low for 8 hours! Enjoy! 


Wednesday, April 8, 2020

ALDI cheesy potato soup

ALDI slow cooker cheesy potato soup
This is one of my husbands favorite soup recipes! It’s super quick, easy and tasty! You’ll need one bag of thawed hash browns, 1 box of chicken broth, 1 can of cream of chicken soup, 1-2 diced small/medium sized onions, 1 block of shredded cheese (we used mild cheddar) and 1 block of diced cream cheese.
You’ll want to start by mixing the hash browns, onion and soup together in your crockpot! That’s it for now! Put it on low for 3 1/2 hours. Add your cheeses in the last half hour and stir to incorporate! Season with salt and pepper to taste! We’ve mixed up garnishes before too! We will usually do cooked and crumbled bacon if we have any, chives, sour cream, top the tator, you name it! This is the perfect comfort dish for a cold day and my husband says it reminds him of the one his mom would make for them grooming up! We usually pick a baguette up and have that with dinner too! It would be good in a bread bowl, that’s a recipe for another day!

ALDI slow cooker cheesy potato soup
Ingredients:
  1. 1 bag of hash browns, thawed
  2. 1 32 ounce box of chicken broth
  3. 1 can of cream of chicken soup
  4. 1-2 small to medium sized onions, diced 
  5. 1 8 oz block of cheese, shredded 
  6. 1 block of cream cheese, diced 
  7. Garnishes such as bacon, chives, etc. (optional)
Directions:
  1. Combine your hash browns, diced onion, soup and broth in your crockpot and place on low for 4 hours.
  2. In the last half hour of cooking dice your cream cheese and shred your block cheese and stir into soup to incorporate.
  3. Garnish with whatever floats your boat and enjoy! 


ALDI Freezer Apple Crisp

ALDI Apple crisp (freezer friendly)

Here is my recipe for a super easy, fast apple crisp/dump cake! I usually make them for the freezer and they freeze well! I just take one out the morning we are going to have it and put it in the fridge. That night it’s ready to cook for dessert and is perfect for two people!

Here are the ingredients! Everything is from ALDI but the brown sugar (I had some leftover great value) and the pans which I get at the dollar tree! They come in a 3 pack for $, have a lid and is a good size for me and the husband! I ended up using three cans of apple pie filling, 1 box of yellow cake mixed  just under 1.5 sticks of butter and a little bit of brown sugar.
First you’ll wanna dump each can of pie filling into your tins. 

Evenly already on the cake mix!
Lastly you cut up your butter and place it on top of the cake mix and then sprinkle some brown sugar over the butter! Don’t forget to cover and label your apple crisp! When you want to bake it, thaw and bake for 30-40 minutes at 350 or until the top is browned. The brown sugar creates a nice caramely crust and it’s always been a family favorite! So many people ask for the recipe and then have to ask again if it’s right because it tastes so good, there’s gotta be more to it!
Here’s our picture after we baked one! They keep well in the freezer too! I usually wrap them in foil once more and we’ve always had good luck with them! I’ve kept mine for up to a month, they don’t tend to last long!