Saturday, November 28, 2015

Rice Krispie poop treats (halloween recipe)

Do you want to really gross out your Halloween guests at our next party? If so, this recipe may do the trick :)
Here is what you'll need.
1 10 oz bag of mini marshmallows 
2 tbs of butter
6 cups of crispy rice cereal 
Chocolate flavored almond bark

First off, melt the butter in the pan. 
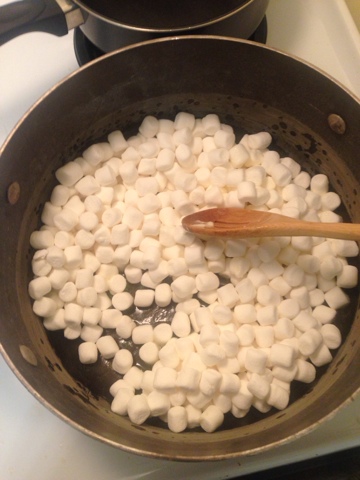
And then you'll want to add all of the marshmallows. Stir constantly to prevent burning. Stir the marshmallows and butter together until it comes to a consistency like this,
After this, take your pan off of heat and add the cereal. Fold it in until all of the ceral is coated evenly with the marshmallow mixture.
Let your mixture cool a little bit but not too long, just so that you can handle it with CLEAN hands :)
Using your hands, form into "poop" shapes. Use our imagination! :) after you have all of your shaped made out, melt some almond bark in a double boiler. If you do not have one of these, you can use a microwave-safe bowl. Make sure to keep stirring to prevent burning! After your chocolate is melted, toss your Krispie treats into the chocolate. Using a fork, roll the treats in the chocolate to ensure that they are completely covered.
Here is how mine came out.
Gross, huh? ;)

Thursday, November 5, 2015

Easy chicken Quesadillas (Aldi recipe)

Here is all you need for a simple, easy treat (tasty too!). 
Ingredients:

Canned or fresh chicken, cooked. 
Cheddar cheese
Tortillas 

As you can see, I used brookdale canned chicken. It turned out pretty good, too!
You'll want to later the cheese and chicken on half of a flour tortilla. When you are done with this, fold it over and transfer to a quesdilla maker; or a pan on the stove works just fine. I used a little griddle and I heated it to medium heat.
Cook each side until evenly browned and remove from heat. Transfer to a plate and serve immediately with your choice of topping (salsa, guacamole, sour cream, etc.)
Don't forget to cut it! I hope that you enjoyed this recipe :) 

Friday, October 23, 2015

Creepy halloween band aid treats

It's that time of year again! My favorite holiday, Halloween! Here is one of my creepy recipes that I made this year...creepy halloween bandaids! These little treats are easy to make, tasty and creepy looking!
Here is what you'll need:
Graham crackers 
Vanilla frosting
Jam or jelly (you can use pretty much anything that's red) 
Food coloring (optional, not shown)
First off, you'll want to carefully break your graham crackers. There's dotted lines so this step should be pretty easy! The only tough part is making sure they don't break apart when you are doing this step. I'm sure we've all been there!
Once that is done, you'll want to spread your frosting on the middle of the cookie, making that gauze strip.
Lastly, you'll want to spread on your jam, jelly or whatever you have into the middle of the frosting. This create the blood drops of the bandaid. I found that my spread wasn't as red as I hoped so I scooped some of it out into a microwave safe bowl, nuked it for 15 seconds, added a few drops of red food coloring and stirred. This helped big time making the spread that nice red color that you see in the picture. I hope you all liked this recipe and don't be afraid to try it for yourself! You'll be amazed at how easy this recipe is! Happy Halloween! :) 

Friday, October 16, 2015

Easy chicken bake (from Aldi)

Thai recipe is a household favorite. It's easy, cheap and filling! Here is what you'll need.
(Preheat the oven to 350 degrees)
3-4 chicken breasts
2-3 cut up potatoes. I used baking and didn't peel them. If you use something smaller, you'll need to add a few more :) Just add enough to fill he side of the pan.
1 can of green beans, or you can use fresh. I used canned because that was all that I had on hand at the moment.
1 packet if Italian seasoning dressing mix.
1 stick of butter, cut up into chunks.

I used a large baking dish and made sure to layer each ingredient in a row.
Then you cut up the butter and scatter that all around the pan.
Next, you would sprinkle the seasoning all over the entire dish. Then, bake at 350 degrees for an hour. When you take the pan out, test the chicken for doneness (it should be 160 degrees at the center and there should be no pink). Serve and enjoy! 

Wednesday, October 7, 2015

Easy pumpkin doughnuts

Here is what you'll need for the easiest, most simple batch of pumpkin cake doughnuts you will ever make!
One box of yellow cake mix (don't add egg, water, oil)
One can of pumpkin purée 
Optional add-ins (cinnamon, nutmeg, etc.)

Directions:
Mix both of the ingredients together in a bowl until batter is moistened. Now you will want spoon the batter into the pastry pan. I used a doughnut pan and filled a pastry bag to make it easier to fill the cavities. You'll want to fill each slot 1/2 way full because the batter is thick. Back for 8-10 minutes at 350 degrees and let cool on a wire rack. To test for doneness, the doughnuts will spring back when touched. I sifted powdered sugar on my doughnuts when they were cooled off completely. You'll want to eat them immediately, they can last up to a day (not that long in my house). 
The two ingredients :)
And now, mixed hehe ;)
The baking process :)
Cooling the doughnuts. One disappeared, that's odd ;)
These were so good! :D 
Make sure to remember; if you are adding any topping, wait until the doughnuts are completely cooled off! Test out with other toppings as well, I am sure that caramel sauce would be amazing! I think I will try that next time! :)

Saturday, October 3, 2015

DIY Halloween graveyard

It's that season again! Time to decorate our house for Halloween. Here are. Few pictures of the set up process. There will be a new post for the finished project :)
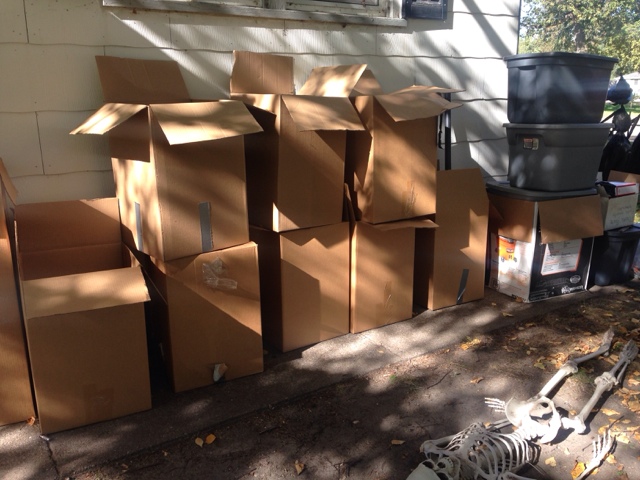
We had lots of boxes up in our attict filled with Halloween decoration (mostly outdoor).
We are making a path for the trick or treaters to follow this year.
Not quite set up yet, see our conjuring witches? ;)
Mr. Harley setting something up. The entrance to our path.
Our Grim Reaper (maybe).
The conjuring witches again, it's a little windy out today!
The start of our graveyard :)
Just a few tombstones here. P.s. Read some of the names ;)
Harley fixing the grim reaper :)
Our fence was home made! Tutorial maybe one day ;)
The graves on the far side of our yard :)
Nothing much to see here, just a pile of bones :)
Where our path ends. Right at our canopy where we will be sitting outside around our fire glass table, handing out treats :) We hope to get many kids this year! :)

Sunday, September 27, 2015

Homemade laundry Detergent (powdered)

Since I started making my own laundry soap, I have saved loads (pun intended) on my detergent bill! I simply make up my own powdered mix and use than in place of the store bought stuff. Here is how you can make an entire year (or if you are me, a year and a half) worth of laundry soap for under $50! With tide running about $22 dollars for a large jug, you will definitely be saving some money. (Can be used in standard and HE washers)
Here is what you will need:
A tub large enough to mix your ingredients
Storage container for soap (I have used large mason jars, the oxy clean containers, etc...what ever I have on hand! I have also used my giant tub)
1 big box of borax
1 big box of arm and hammer super washing soda
1 med-lrg box of arm and hammer baking soda
1 3 lb container of Oxy clean booster 
I large bottle of downy unstoppables (for scent. If you have sensitive skin, feel free to leave these out)
2-3 bars of grated laundry soap (I used Fels-Naptha)

Here are all of my ingredients, laundry tub not pictured
You want to thoroughly mix everything together in the tub. My tub looks quite empty because I already transferred the soap into my container at this point.
Here is the tub I used. I actually made this batch for a friend of mine who was getting married. She loved the soap and I decided to make a large batch for her as a wedding gift (you can say it, I'm awesome, I know! Oh thanks)! I hope that you all enjoyed this recipe and if you do give it a try, let me know your thoughts on it! :)

Sunday, September 13, 2015

The best homemade pasta sauce

Made from freshly picked tomatoes, basil, simple herbs and spices, and a few other ingredients, this sauce is wonderful! It turned out nice and thick, with a great flavor :) ingredients:
15-20 lbs of tomatoes (I used Roma from the garden)
2 large white onions, diced
12 basil leaves, chopped 
10 cloves of garlic, chopped
2 tsp. dried oregano
2 bay leavs
3 star anise
2 tsp. salt
1 tsp. black pepper
4 cans of tomato paste with herbs (6 oz)
2 cans of tomato sauce (29 oz)

Start off by blanching, peeling and seeding your tomatoes. This is the long part, so buckle up and enjoy!
Add all of those to a large stock pot, along with your herbs: Chop up your onion, Garlic and basil and add to the stock pot.
Add everything but the sauce and paste and boil, stirring frequently.
Your tomatoes will start to break up at they boil. If they are a little too chunky, you can mash them up with a potato masher. I prefer a thicker sauce, so I slipped this step. 
Simmer for 3-5 hours and then slowly add I'm the sauce and paste. Do not. Forget to stir! Simmer for about an hour and add to sterilized pint sized mason jar. Add a tablespoon of bottled lemon juice per jar to preserve the sauce and prevent discoloring. If preserving in quart sizes jars, add two tablespoons of lemon juice. This sauce turned out pretty thick, which we wanted so we are using pint sized jars, we feel that one jar will be more than enough for a meal. We usually use about 1/4 of a jar for each spaghetti meal we make! I usually warm up the dab of sauce with some plain tomato sauce. This recipe uses so much tomato paste that we can get about 4 meals out of each jar. If you want, you can freeze 1/4-1/2 cup portions of the sauce to use when your ready! I like to use my food saver and freeze 1/2 portions, lay nice and flat to freeze and when we want to use it, I take it out the day we are having spaghetti and put in the fridge or take out while Im boiling the water for the noodles and pale it in a bowl with warm water to thaw out. Cook in a sauce pan with water or plain tomato sauce.  There you have it! Condensed pasta sauce ;)

Saturday, September 12, 2015

DIY glitter reusable solo cup!

For my best friends birthday this year, I decided to get a little creative and make something! I made a glittered up reusable red solo cup! First off, here is what you need: 
Reusable red solo cup
Mod podge
Extra fine red glitter 
Sealant (not pictured)
Here's the cup :)
And here's everything else :)
First off, you'll want to line the rim with some blue painters tape.
Next, cover the cup in a thick layer of Mod Podge.
And then, cover with glitter and shake off the excess. Do this to the entire cup until it is completely covered.
Now, let the glitter dry on for a little while. I let it sit for 20-25 minutes. After that, I covered it in sealant, making it dishwasher safe. One thing to be cautious about, make sure not to get the sealant on the rim of the cup! If you do, it's probably a good idea that you not drink out of it. She loved her present too, by the way ;)